Summary
Step-by-step guide for configuring a SIP Trunk connection between Asterisk 10/13 (FreePBX) and TRBOnet, including trunk creation, outbound route setup, SIP settings, and TRBOnet integration.
Prerequisites
• AsteriskNOW is the premier, ready-to-run distribution of open source Asterisk.
• It is distributed as ISO image that installs Linux, Asterisk and the FreePBX GUI in a single, simple install.
• Installation instructions located on official web site www.asterisk.org.
• Prerequisite for this guide is installed and running Asterisk 10/13.
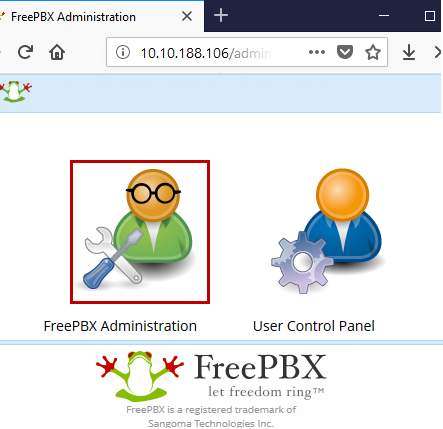
Opening FreePBX Administration
1. Start an internet browser and open FreePBX GUI web page, click on FreePBX Administration icon (requires login and password set during installation).
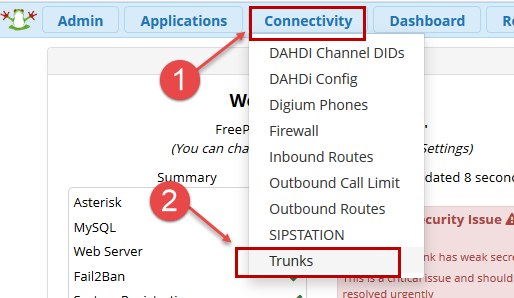
Setting up Trunk in Asterisk
2. Go to menu .
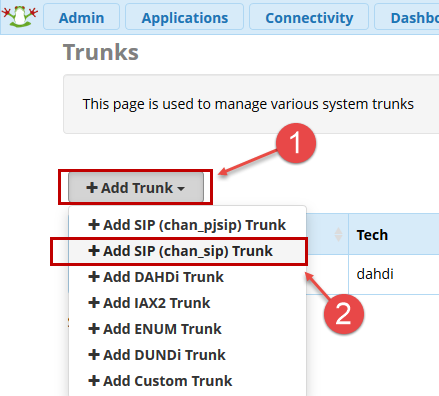
Add SIP (chan_sip) Trunk:
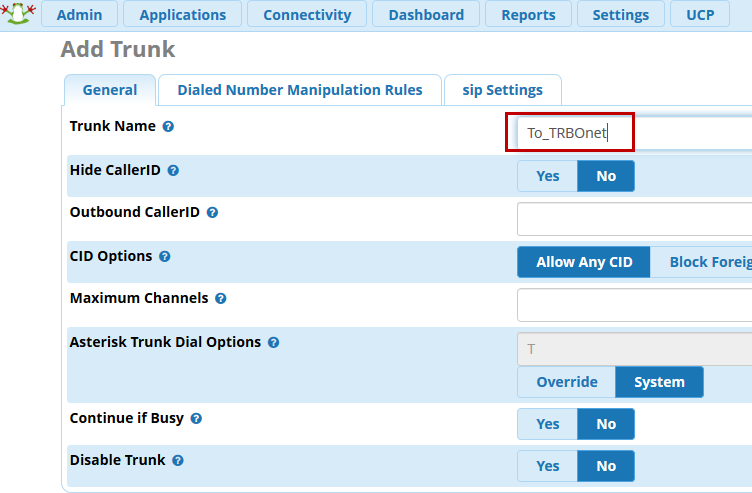
Assign a name to newly created Trunk:
3. Go to , set IP address of TRBOnet server.
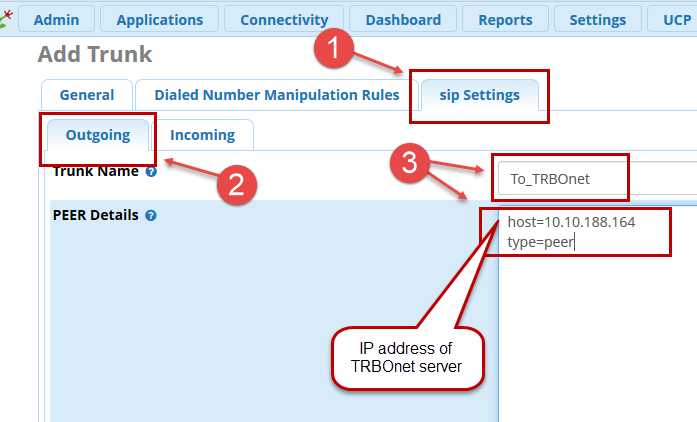
Click OK in pop-up window about absence of CID.
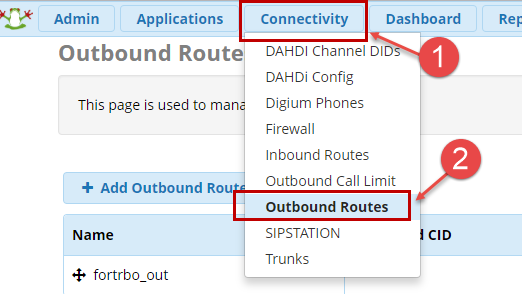
Adding a Route in Asterisk
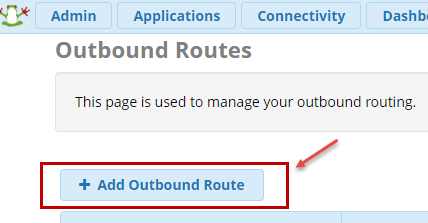
4. Go to under menu.
Add Outbound Route:
Assign a name to created route:
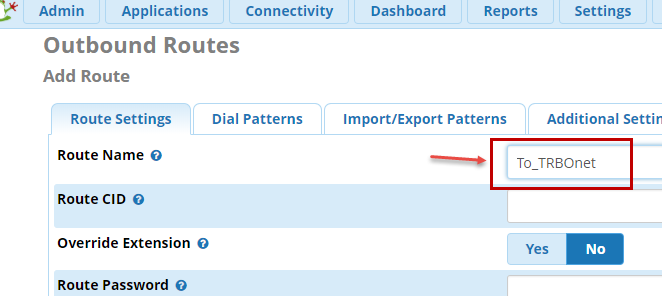
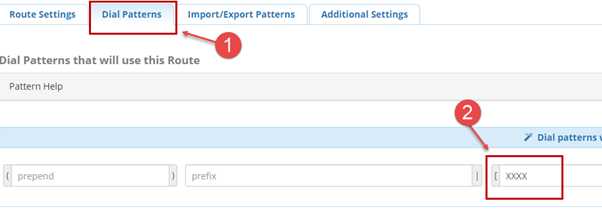
5. Go to tab and set desired dial pattern (on the example all numbers matching pattern xxxx will be forwarded to TRBOnet in our example all Subscribers have 4 digits Radio ID, hence we are setting pattern to xxxx, 4 digits).
Asterisk SIP Settings
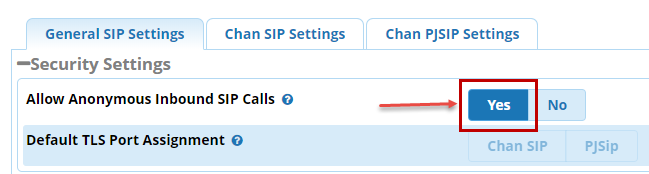
6. Go to menu .
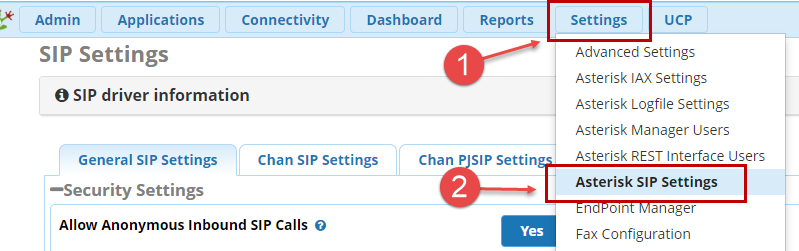
Set to :
7. Go to .
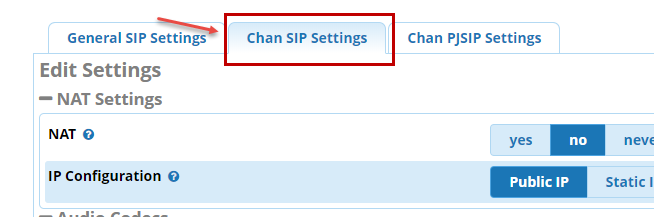
Set Bind Port to desired (on example is the default port used in TRBOnet 5060):
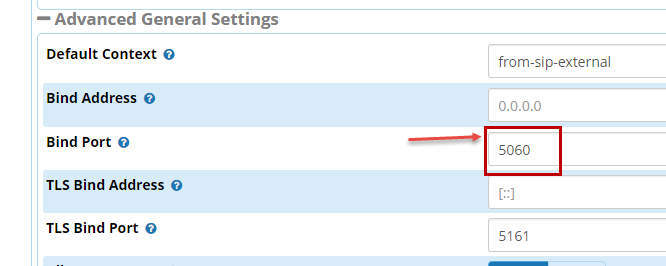
8. Apply config.
Hooking up TRBOnet to Asterisk Trunk
9. Configure TRBOnet for SIP trunk, input PBX IP address and port, choose local IP address you set in step 3 and Local Port.
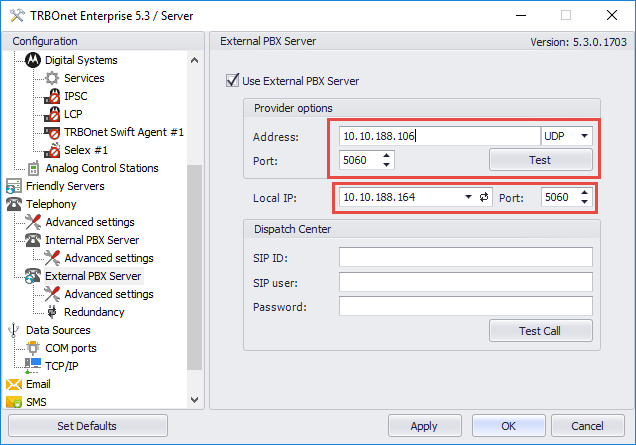
10. In advanced settings set tick "Do not register users on PBX server (SIP Trunk)".
