Swift Logic in Swift CPS 2.1 and later supports Enhanced GPS (windows 5 to 10) and Enhanced GPS with CSBK (windows 1 to 2) through Data slots in IPSC and CapacityMAX or through Data repeaters in CPSS, CPMS, and CapacityMAX.
This article describes Swift Logic configuration only. The radio system must already be configured for EGPS or EGPS+CSBK.
Enhanced GPS (windows 5 to 10)
Steps
1. Use Motorola System Planner Enhanced GNSS Revert Channel chapter to calculate system data capacity and choose the Enhanced GPS window size.
2. Configure the Data slot or Data repeater in the codeplug to use the selected window size.
3. Configure the subscriber radio codeplug to use the Data channel with the same window size.
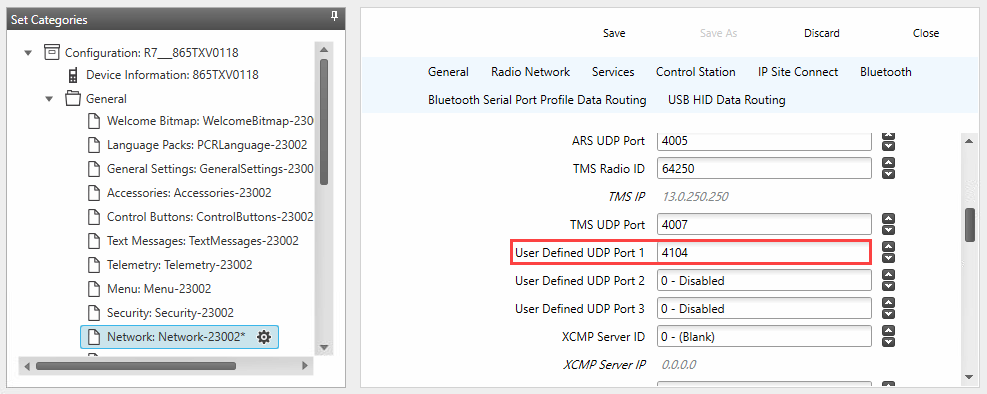
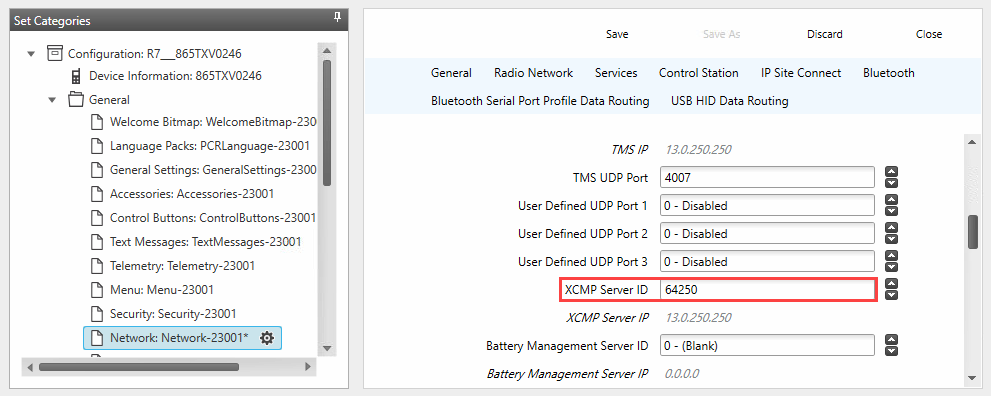
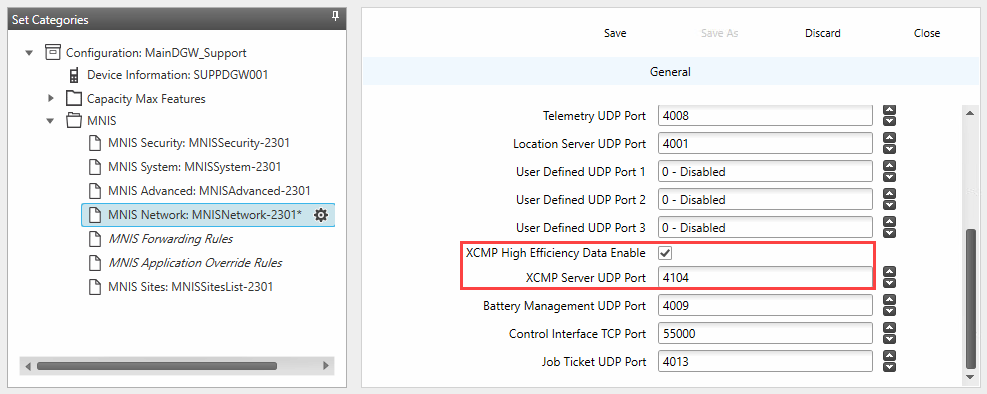
4. Set to or and set to the Swift Tracker V2 Service UDP port (default 4104) in both radio and MNIS network settings.

5. Enable on the subscriber radio channel.
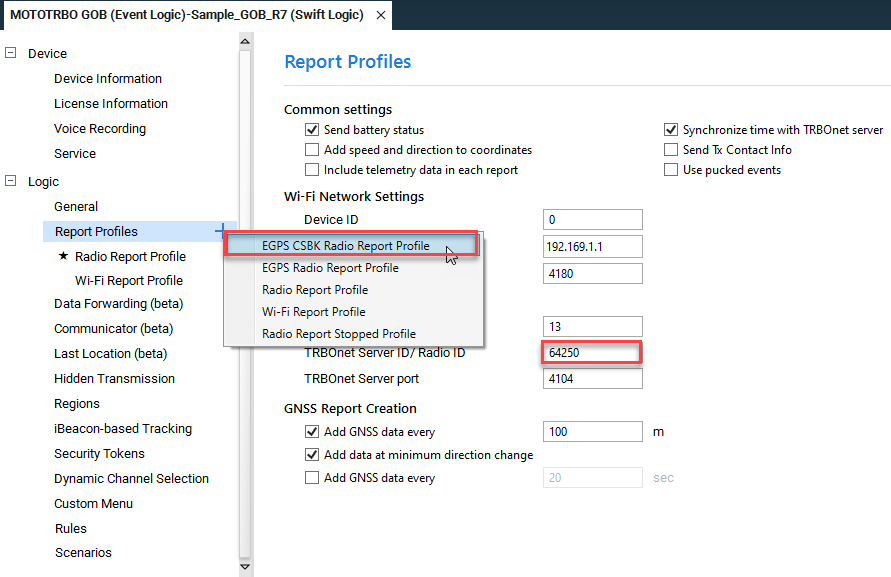
6. In Swift CPS configure Swift Logic:
- Set MNIS or TRBOnet Radio ID as data receiver.
- Add the EGPS radio report profile.
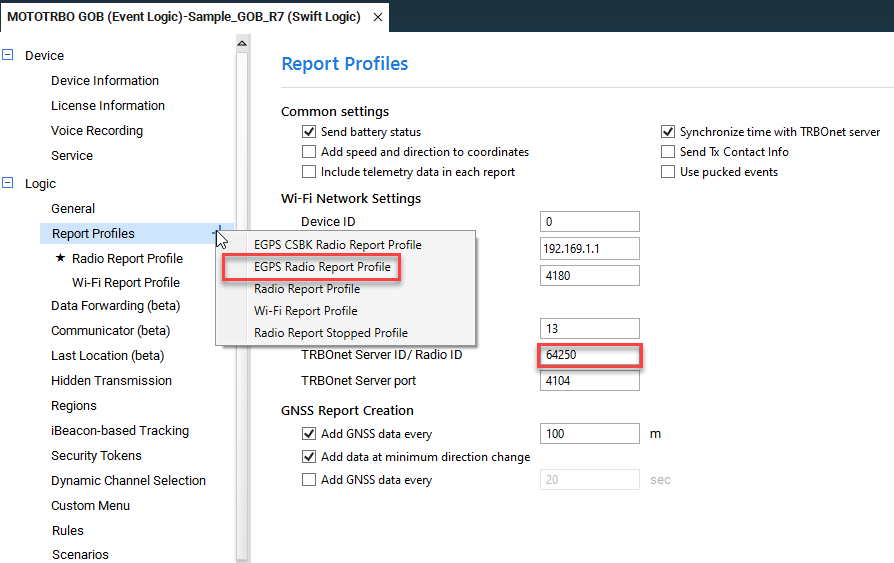
- Set this profile as Default.

- Set the Enhanced GPS window size. It must match or exceed the system window size.
- Set the update interval. Allowed values are 30, 60, 120, 240, 480 seconds.
7. In TRBOnet create an Extended Device Location profile with an interval equal to or longer than the Swift Logic interval.
8.In the TRBOnet subscriber radio profile select Extended Device and select Location source with created Location profile.
Enhanced GPS+CSBK (windows 1 to 2)
Steps
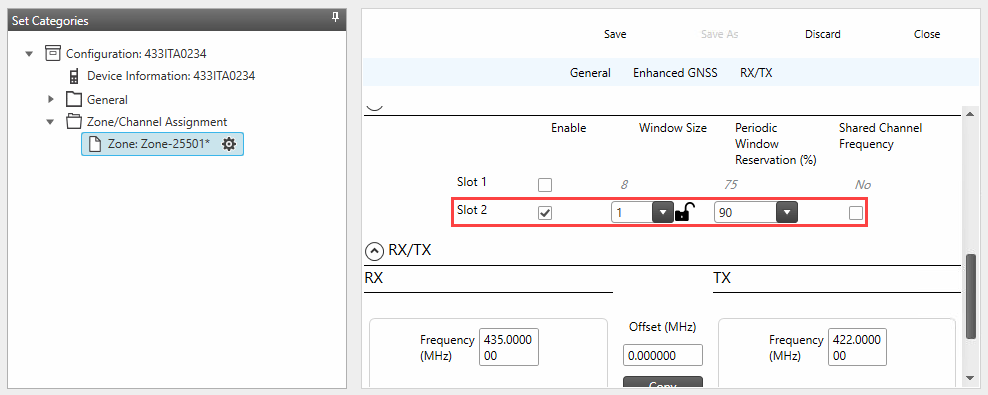
1. Configure the Data slot or Data repeater codeplug for the window size. Set percent to 90.
2. Configure the subscriber radio codeplug to use the Data channel with the same window size.
3. Enable on the subscriber radio channel.
4. Set in the radio Network settings to the MNIS Radio ID.
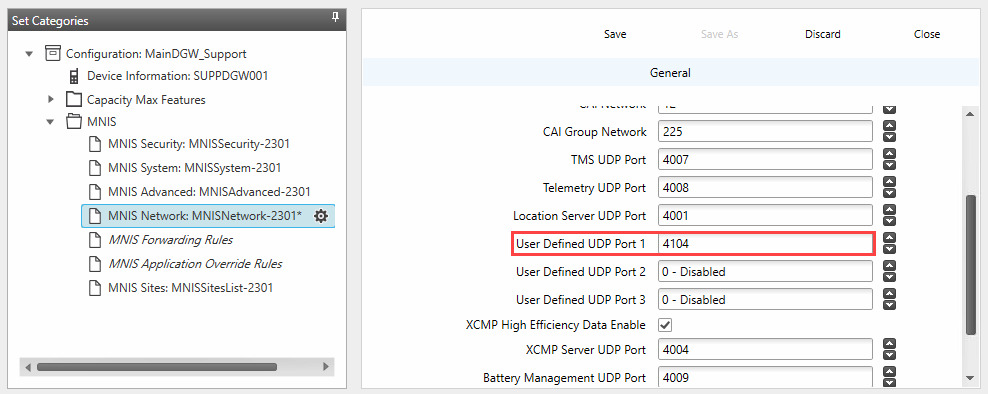
5. In MNIS Network settings enable XCMP and set to the TRBOnet Swift Tracker V2 Service port (default 4104).
6. In Swift CPS configure Swift Logic:
- Set MNIS ID as data receiver.
- Add the EGPS CSBK report profile.
setting must be equal to MNIS application ID, not TRBOnet Radio ID. Data is sent to MNIS.
- Set this profile as Default.

7. Enable on the subscriber radio channel.
8. In TRBOnet Server settings enable in the Added Radio System
9. Create an Extended Device Location profile in TRBOnet.
10.In the TRBOnet subscriber radio profile select Extended Device and select Location source with created Location profile.
Notes
1. Enhanced GPS+CSBK cadence is fixed at 7.5 seconds.
2. TRBOnet Server computer time offset must not exceed 73 seconds.
3. EGPS+CSBK profiles always send Major 1. Set all beacon Major values to 1 if using mixed radio reports to avoid confusion.